
This is for Erin S., who wanted to know how to make braided bread. This is a Polish Kielbasa and Cheddar Cheese bread, and it's pretty tasty. I took it to a friend's house for dinner last night as the appetizer, and it was very well received. I also learned something interesting about kielbasa...as in the way it's pronounced. Evidently, in the South where we tend to leave out constanants or whole endings of words, we are all compelled to say the "L" in the middle, as in "kill-bas-a." According to the people from the frozen North, who come from areas with heavy Polish populations, it is pronounced "key-basa," or something like that...the "L" is silent. Who knew?!
Here we go:
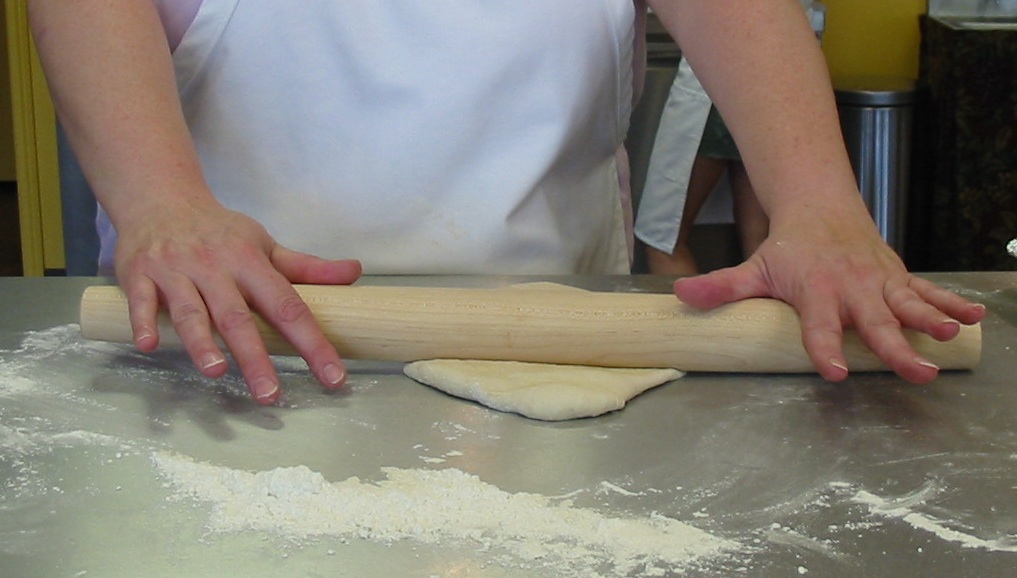
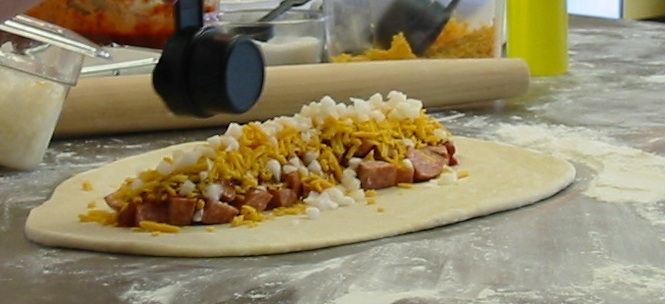
First, you take your thawed frozen bread dough (this is Bridgeford brand; I've used fresh pizza dough from the grocery before, too), and roll it into an oblong shape. Remember, you don't have to be perfect--this is why we call this "rustic."

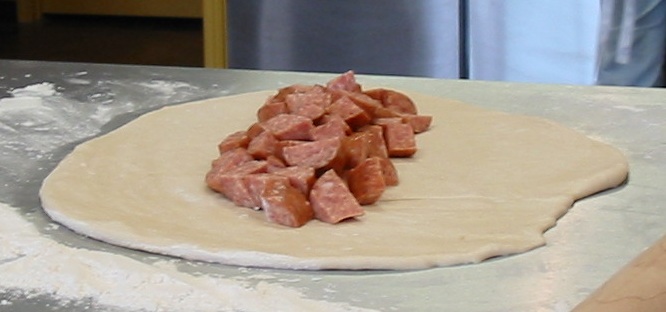
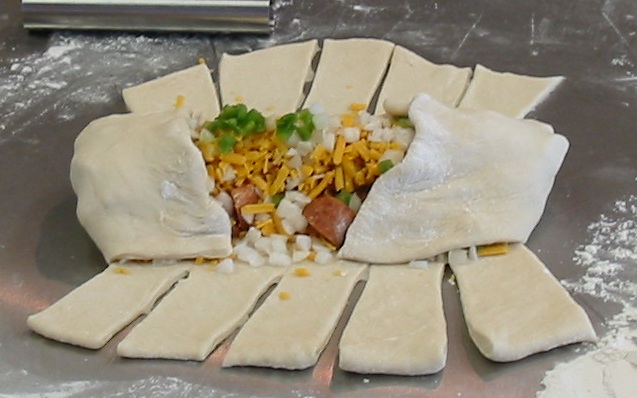
Next, you put the diced Kielbasa down the middle of the dough. I used about 8 ounces or so.
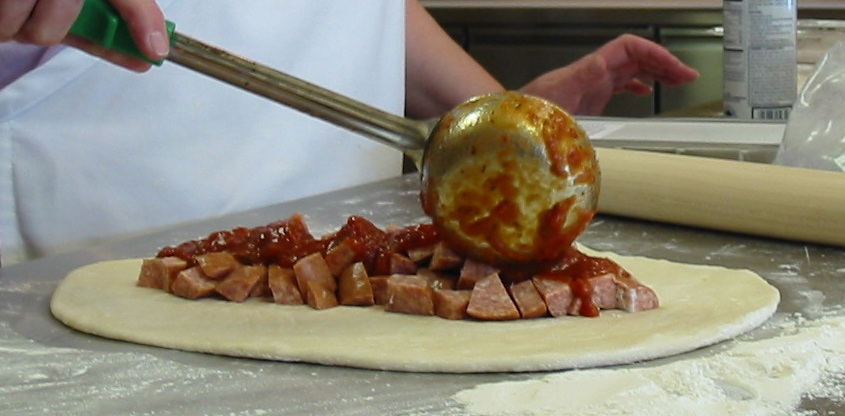
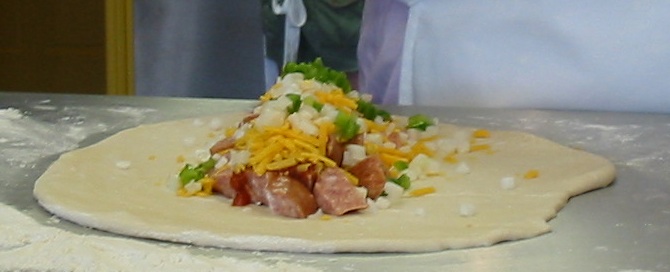
Add 1/2 cup marinara sauce over the sausage:
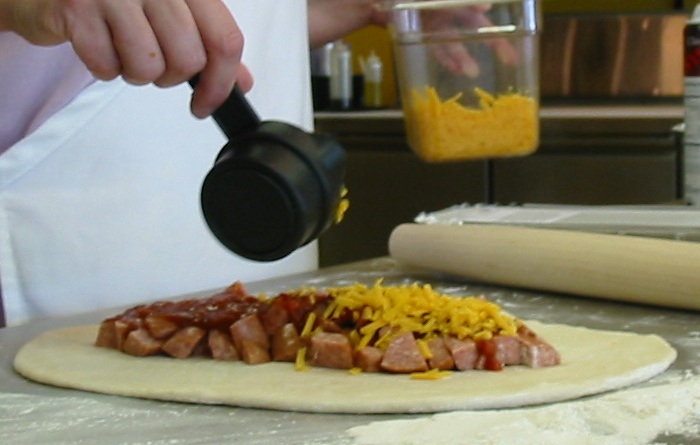
Add 1/2 cup shredded cheddar cheese:
Add 1/4 cup diced onions:
And a few diced green peppers; The Man and I aren't big green pepper fans, but it does look pretty. If you like green peppers, you can add about 1/4 cup.
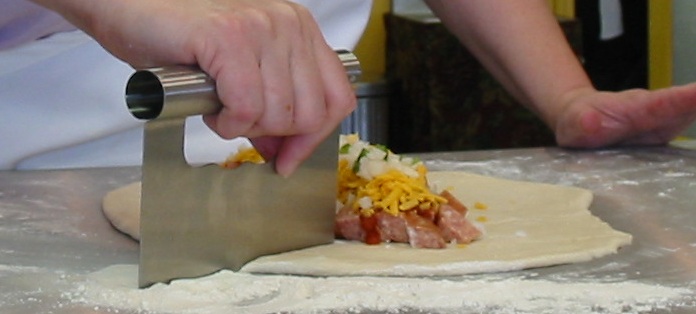
After all the ingredients are in place, you will take a dough cutter or a knife and make slashes down the sides of the bread. You will want to leave the top and the bottom areas uncut. Try to make an even number of slashes down each side, and thicker is better.
It will look something like this:

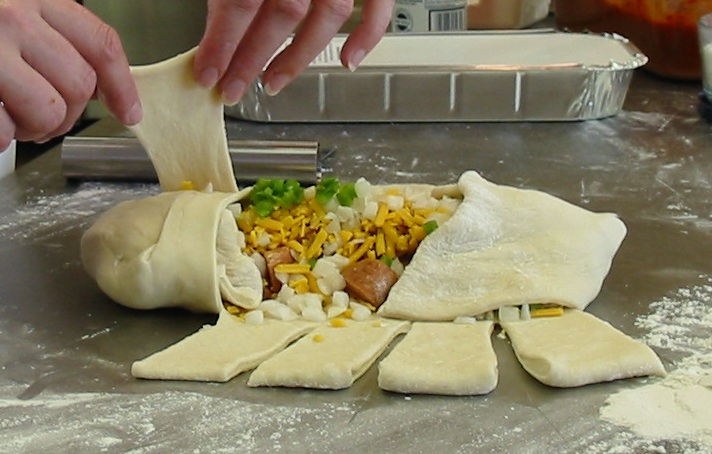
Now, we make the Mummy (finally, she gets to the analogy for the title of this post!). Take the bottom flap and tuck in the mummy's feet:
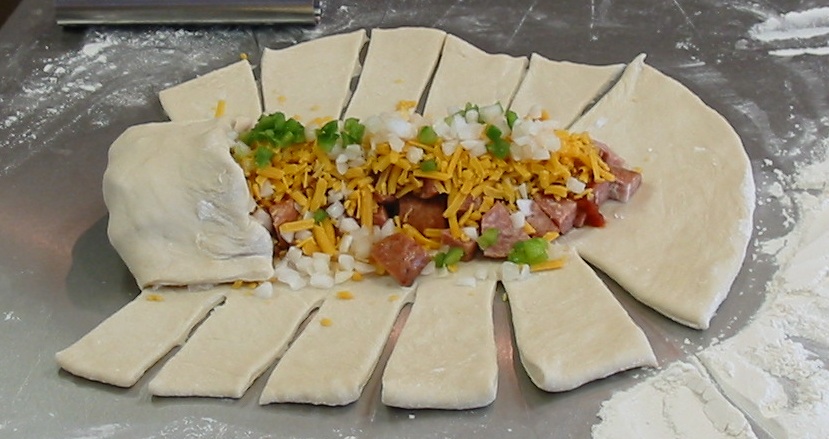
And, then tuck the mummy's head:
The Mummy needs to be wrapped, so start at the bottom right and take a strip of the dough and cross it over to the opposite side. Take the opposing bottom left strip and cross it over; continue doing that until you reach the top. Then, you will have 2 weird flaps that you aren't sure what to do with (at least I always do!), and I just cross them back down the mummy.
After the mummy is bound, brush a little oil on the top and sprinkle with a little kosher salt:
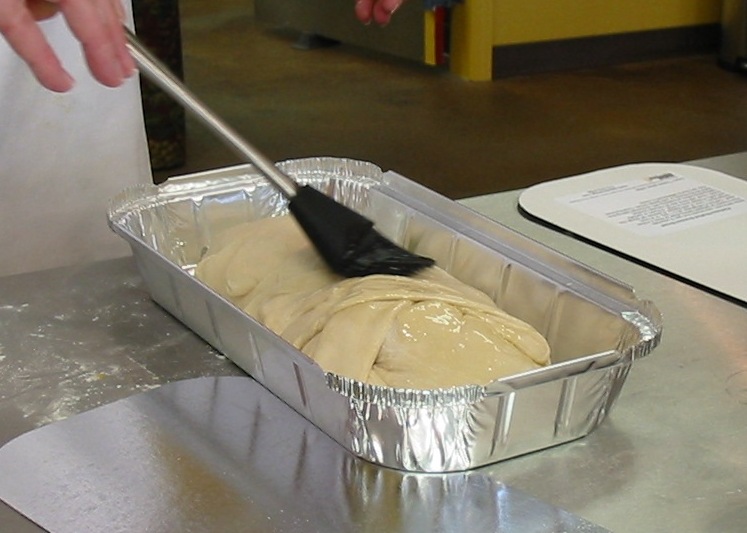
Now, your mummy is ready for entombing either in the freezer or the oven:
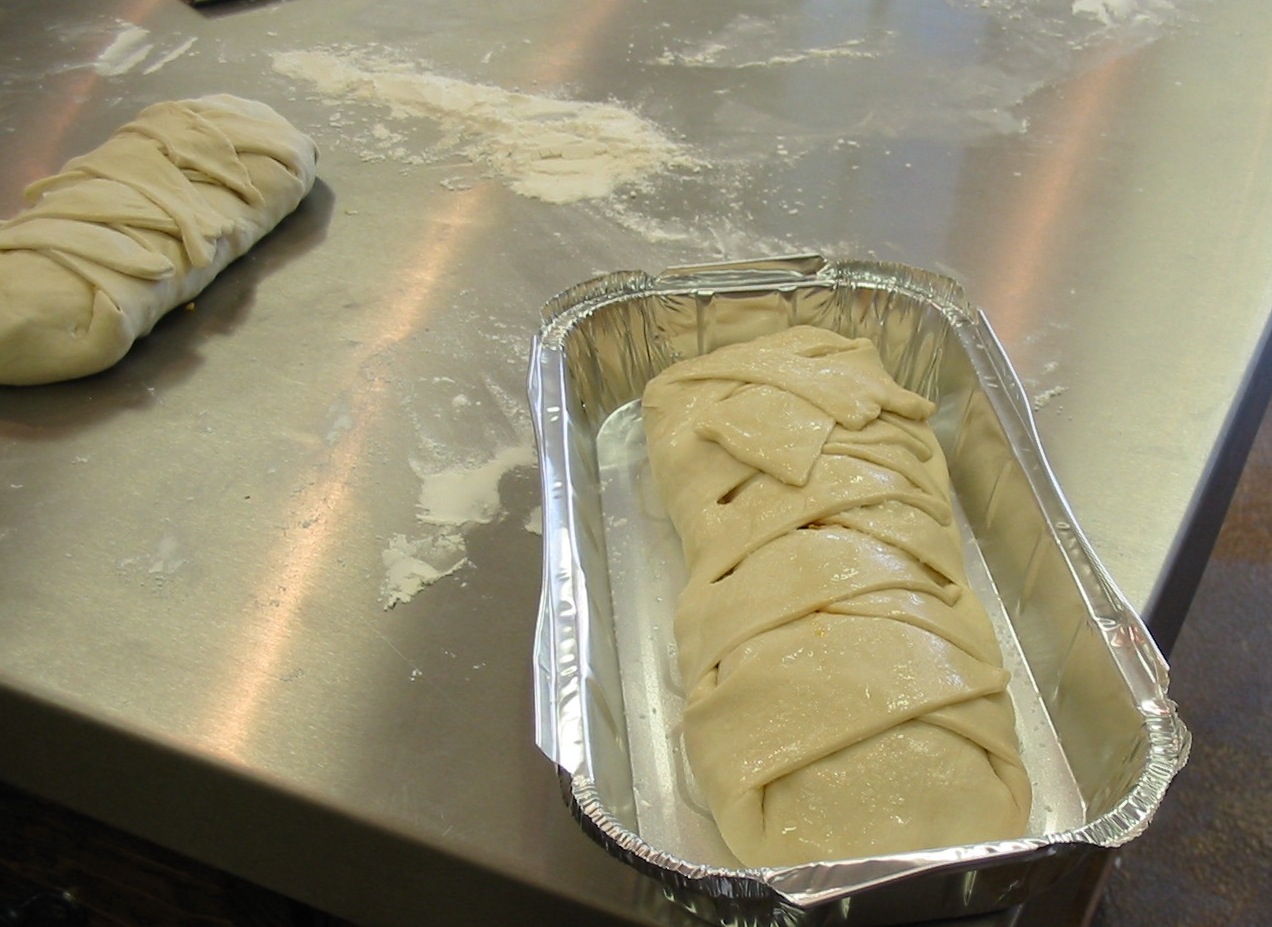
If you opt to cook your mummy immediately, preheat the oven to 375° and put the mummy on a lightly greased baking pan (cooking spray works fine) and pop it in for about 20-30 minutes; cooking times may vary, depending on your oven. You will want to use a baking pan as opposed to a cookie sheet, because the mummy might burst its seams in places, and leak a little bit. (I know, I know--this imagery is getting weird!).
If you opt to freeze your little mummy, you will need to pop it out of the pan, place on a lightly greased baking sheet and thaw it out completely. Then, follow the directions above. If you have to cook it from the frozen state, defrost in refrigerator up to 1 day, or at room temperature 1 hour or until thawed. If desired, let dough rise until puffy. If frozen or partially frozen, cover with foil & add 20 minutes covered baking time before proceeding with uncovered baking time. This all may vary, depending on your oven.
Of course, we ate the darn thing before I thought about getting a picture of the finished product. I may have to make another one and update this post.
Enjoy your mummy's day!!

2 comments:
Oh, yum. I'm going to make it. I'd been putting it off, but tonight's the night. Thank you!
Ohhh, that looks yummy. I might have to try that some time.
Post a Comment